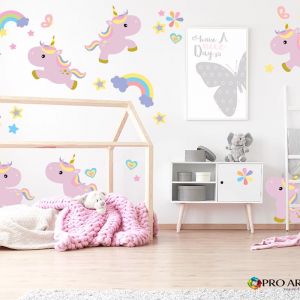
Kids Wall Decals and Stickers
Wall decals are a fantastic way to add a personal touch to your living space. Whether you want to spruce up your home or add a creative touch to your office, wall decals can transform your environment.
Step 1: Prepare Your Surface Before applying your wall decal, it's essential to prepare the surface properly. Clean the wall to ensure there's no dust or debris, as this can affect the adhesion of the decal.
Step 2: Get Your Tools Ready You'll need a few tools to ensure a smooth application process. These include a squeegee and, of course, your wall decal. Lay the decal face down with the backing paper facing up on a flat surface.
Step 3: Release the Vinyl Now, take your squeegee and firmly rub it over the back of the decal. This action helps the vinyl release from the backing layer and adhere to the transfer layer. This is a crucial step for a successful application.
Step 4: Align the Decal When it comes to positioning your decal on the wall, you have a choice. If you want to ensure perfect alignment, use a measuring tape to create reference marks on the wall. Alternatively, if you're comfortable eyeballing it, go for it.
Step 5: Hinge Method To keep the decal in place on the wall while removing the backing paper, use the "hinge method." This involves attaching a piece of tape to the top of the decal. It acts as a hinge to hold the decal in position as you work.
Step 6: Removing the Backing Paper Starting from the corner, slowly peel back the backing paper. Take your time during this step, and if you encounter parts that are still stuck to the backing layer, gently put them back and rub over them with your hand, ensuring a gradual and careful process.
Step 7: Smooth the Decal Now that the backing layer is removed, let the decal hang a little loose and then start smoothing it down. Use your squeegee to press the vinyl against the wall from the top down. Again, take your time and be thorough.
Step 8: Final Check After smoothing the decal, give it one last pass with the squeegee to make sure the vinyl is firmly adhered to the wall.
Step 9: Removing the Transfer Layer To remove the transfer layer, start at a corner and peel it back at a 45-degree angle. This should be done slowly, and you can also use the squeegee to help press the vinyl against the wall as you go.
Step 10: Registry Marks for Multi-Part Decals If you're working with multi-part decals, you may notice registry marks. These marks are essential for alignment. Make sure the registry marks on the decal match those on the wall, and press down firmly with a squeegee to secure them.
Step 11: Final Touch Remove the transfer layer and any registry marks. Go over the entire decal with your finger to ensure everything is firmly stuck to the wall.
And there you have it! You've successfully applied your wall decal. The process may seem involved, but by following these steps carefully, you can achieve a professional-looking result.
Lastly, don't forget to take a picture of your beautifully applied decal. The Block Shop loves to see their decals adorning your walls, and your creativity might inspire others to embark on their own wall decal journey. Enjoy your newly decorated space!

-
 Animals Collection 2 | Wallpaper Cut OutsSpecial Price $55.96 $69.95
 -
-

-